
When it comes to home improvement projects, few things are as satisfying as a successful DIY bathroom transformation. Recently, I embarked on such a journey with the KES Rectangle Vessel Sink, a 16″X12″ white porcelain ceramic sink that promised to elevate the look of my bathroom. Here’s a step-by-step account of my experience, from choosing the sink to the final installation.
Choosing the Perfect Sink
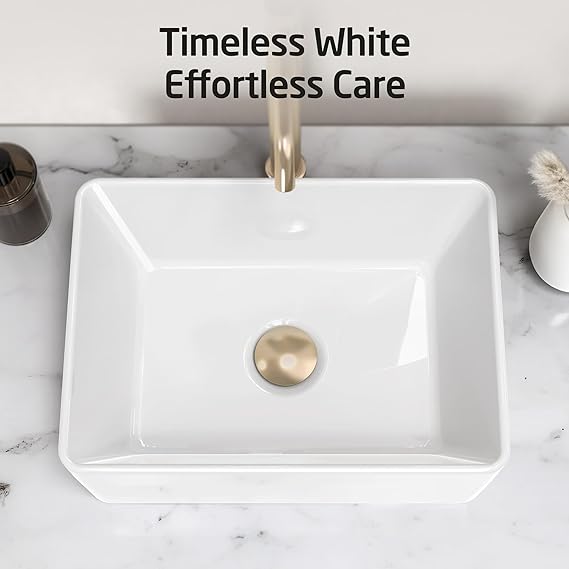
The first step in any bathroom makeover is selecting the right fixtures. I spent countless hours browsing through various sinks, looking for one that would blend seamlessly with my Art Deco-inspired bathroom. The KES Rectangle Vessel Sink caught my eye with its sleek, minimalist design and compact size. Measuring 16″X12″, it was perfect for my small bathroom counter. The white porcelain ceramic finish promised durability and a clean, timeless look.

What really sold me on the KES sink were the rave reviews from other DIY enthusiasts. Many praised its high-quality construction and easy installation, which was crucial for me as I planned to tackle this project on my own. Confident in my choice, I placed my order and eagerly awaited its arrival.
The Arrival
A few days later, the sink arrived at my doorstep, securely packaged and in perfect condition. Unboxing it was an exciting moment—seeing it in person, I could immediately tell that the quality matched the online photos and descriptions. The smooth, glossy finish was flawless, and the compact size was ideal for my bathroom counter.
Along with the sink, the package included all the necessary mounting hardware and a detailed installation guide. This was a relief, as I had heard horror stories of missing parts and vague instructions from friends who had embarked on similar projects. With everything I needed in hand, I was ready to begin the installation process.
Installation
Before starting the installation, I gathered all the tools I would need: a drill, a wrench, silicone sealant, and a tape measure. The installation guide provided by KES was clear and easy to follow, breaking down the process into manageable steps.
Step 1: Preparing the Counter
The first step was to prepare the counter for the new sink. I removed the old sink and cleaned the counter thoroughly. Measuring and marking the placement for the new sink was crucial to ensure it was centered and aligned perfectly.
Step 2: Drilling the Holes
Next, I drilled the holes for the mounting hardware. The guide recommended using a diamond drill bit for a clean cut through the countertop material. This step required precision and patience, but the clear instructions made it manageable even for a DIY novice like myself.
Step 3: Installing the Sink
With the holes drilled, it was time to position the sink on the counter. I applied a generous bead of silicone sealant around the base of the sink to create a watertight seal and prevent any future leaks. Carefully lowering the sink onto the counter, I pressed it down firmly to secure it in place.
Step 4: Securing the Hardware
The final step was to secure the sink with the provided mounting hardware. Using the wrench, I tightened the nuts and bolts, ensuring the sink was stable and secure. A quick cleanup of excess sealant and a final check to make sure everything was aligned perfectly, and the installation was complete.
The Result
Stepping back to admire my handiwork, I was thrilled with the transformation. The KES Rectangle Vessel Sink added a touch of modern elegance to my bathroom, and the white porcelain finish brightened up the space. The compact size was perfect for my small counter, proving that you don’t need a massive sink to make a big impact.
Not only did the sink look fantastic, but the entire installation process was surprisingly straightforward. The detailed instructions and high-quality materials made it a breeze, even for someone with limited DIY experience.
Final Thoughts
If you’re considering a bathroom makeover, I highly recommend the KES Rectangle Vessel Sink. Its sleek design, durable construction, and easy installation make it an excellent choice for any DIY enthusiast. Transforming your bathroom doesn’t have to be a daunting task—with the right tools and a bit of patience, you can achieve professional-looking results and create a space you’ll love.
Happy DIY-ing!


Leave a comment