How to Choose the Best Sink for Your Kitchen?


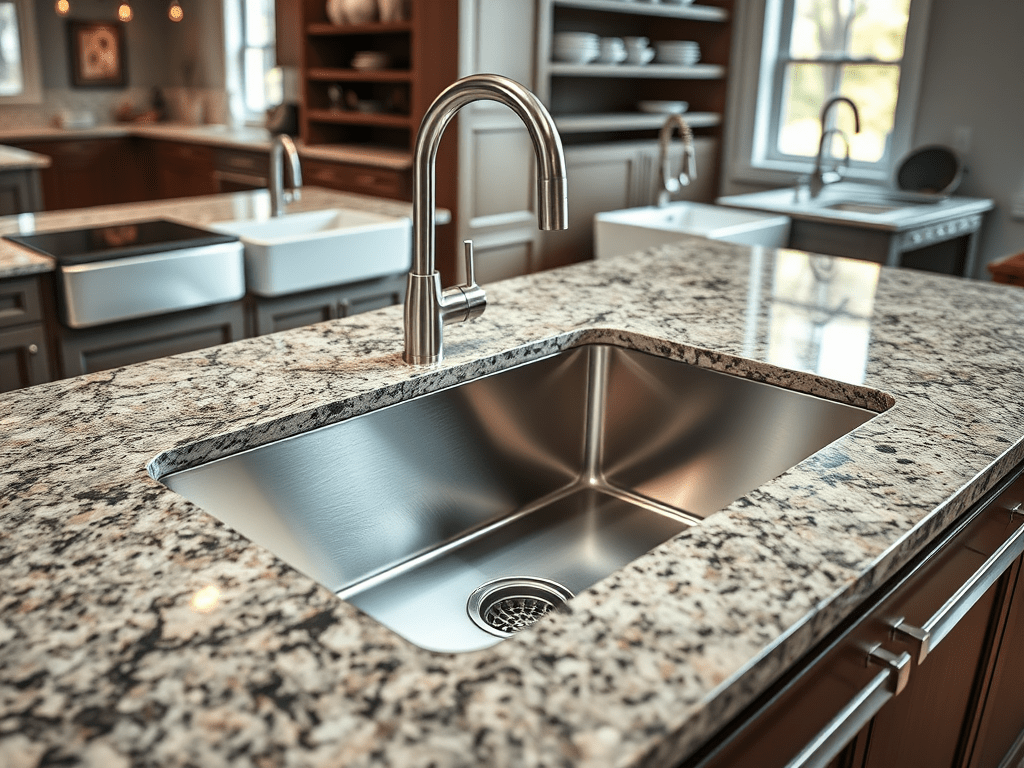
Why picking the right kitchen sink matters

When you plan a kitchen upgrade — after selecting appliances, countertops, fixtures — the sink is more than a functional necessity. It sits at the center of daily kitchen life: from washing dishes and prep work to meal-clean up. The wrong sink can make everyday tasks annoying, limit your counter space, or clash with your overall design. The right sink, however, can improve workflow, enhance aesthetics, and become a subtle but important component of the style and feel of your kitchen.

Because sinks come in many types, styles, materials, and sizes — what works for one kitchen might not work for another. That’s why it’s worth spending time choosing wisely.


Types of Kitchen Sinks & Materials

Here’s a breakdown of the most common sink types and materials — plus what they offer (and what to watch out for).

🔸 Mount style: how the sink sits in/on your countertop

  • Undermount sinks — These are installed under the countertop, so the rim is hidden. The result is a clean, seamless surface, making it easy to wipe crumbs or spills directly into the sink. They’re especially great with solid countertops like granite, quartz, or solid surface. (Engineers and Architects of America)
  • Top-mount (drop-in) sinks — With this style, the sink’s rim sits on top of the counter. These are easier to install (often cheaper), and good if you’re replacing a sink without changing countertops. (Modernize)
  • Apron-front / Farmhouse sinks — Also sometimes undermount (though not always), these sinks have a front panel (the “apron”), often extending slightly beyond the counter’s edge or cabinet line. They make a bold design statement and usually offer a deep, wide basin. (Engineers and Architects of America)
  • Workstation sinks — A more multipurpose option: these combine the basin with built-in ledges or features that hold cutting boards, drying racks, colanders, prep bowls — turning the sink into a mini-prep / cleanup station. Great for busy cooks or smaller kitchens to maximize function. (Engineers and Architects of America)

🔸 Sink materials — what the sink is made of

Your sink’s material affects durability, maintenance, appearance, and how it matches with your countertops / kitchen style. Some common materials:

  • Stainless steel — Probably the most popular because it’s durable, easy to clean, bacteria-resistant, and works with many design styles. Works particularly well with stone countertops. Heavier-gauge stainless (like 16–18 gauge) is more dent-resistant and durable. (Modernize)
  • Granite / Quartz (composite) — Composite sinks (made from stone dust + resin) offer the look of natural stone, resist scratches, heat, and stains, and often hide wear well. They give a more substantial, earthy, or high-end look. (The Dedicated House)
  • Fireclay / Porcelain / Ceramic — These materials give a classic, timeless feel. Fireclay sinks are durable and resistant to stains, while porcelain or ceramic sinks offer a glossy, clean look. They pair beautifully with farmhouse or traditional kitchen styles. (The Dedicated House)
  • Cast iron (enameled) — Offers vintage or classic appeal, with a glossy finish and sturdy feel. However, because of their weight, they often require reinforced cabinetry and care to avoid chipping. (The Dedicated House)
  • Natural stone (granite, marble, soapstone) — Luxurious, unique, and often considered a statement piece. They provide a high-end, one-of-a-kind look. But they tend to be expensive, heavy, and may require sealing or special maintenance. (Leading Indicators)

How to Choose the Right Sink for Your Space

When you pick a sink, think about:

✅ 1. Your lifestyle & kitchen usage

  • If you cook often, use large pots, or do big meal prep — a single-basin sink (especially deeper or wider) may be ideal. It’s easier to clean big items. (Modernize)
  • If you multitask (e.g. wash dishes + rinse produce separately), a double-basin sink or a workstation sink can make sense. (Granite Depot)
  • If space is limited — a more compact sink or a sink with integrated prep features helps. Workstation sinks especially maximize utility.

✅ 2. The style of your kitchen & overall aesthetic

  • For modern, sleek kitchens — stainless steel undermount sinks or composite stone-look sinks can keep clean lines and simplicity.
  • For traditional, farmhouse, rustic or cozy kitchens — fireclay, porcelain, or even cast iron apron-front sinks can add warmth and charm.
  • For a statement centerpiece — apron-front (farmhouse) or natural stone sinks can draw the eye.

✅ 3. Countertop material & cabinetry

  • Undermount sinks pair best with solid countertops like granite, quartz, or solid surface — they require the counter to be cut precisely and supported properly. (Engineers and Architects of America)
  • If you want to avoid cutting new countertops (or easy DIY), a drop-in / top-mount sink might be more practical.

✅ 4. Maintenance & durability

  • If you want low maintenance: stainless steel or composite sinks are easy to clean and quite durable. (Modernize)
  • If you prefer classic looks but don’t mind some care: fireclay or porcelain give timeless charm but can chip or stain if heavy items are dropped. (The Dedicated House)
  • If you like luxury and uniqueness and are okay with upkeep: natural stone can be a beautiful choice but often needs regular sealing / special care. (Leading Indicators)

What’s Trending in 2025: Top Sink Styles Homeowners & Designers Love

According to recent design-industry sources, the following sink styles & materials are especially popular in 2025:

  • Stainless steel undermount sinks remain a top pick: durable, versatile, and blending easily with quartz, granite or solid surface countertops. Many new models also include improvements like sound-dampening and scratch-resistance. (SurfaceIQ)
  • Farmhouse / Apron-front sinks — combining classic charm and practicality, they remain deeply popular in 2025, especially for kitchens aiming for cozy, rustic, or transitional vibes. (RTA Kitchen & Bath)
  • Composite granite/quartz sinks — offering stone-like look with modern durability, these continue to grow in popularity as they deliver both performance and aesthetic flexibility. (The Dedicated House)
  • Workstation sinks — sinks with built-in accessories (cutting boards, drying racks, colanders) that turn the sink into a multifunctional workspace. Great for efficiency, especially in smaller kitchens or for people who cook a lot. (Engineers and Architects of America)
  • Natural / textured / earthy finishes — matte, stone-like, or warm finishes (not just shiny stainless). These complement modern farmhouse, Scandinavian, or transitional kitchens. (SurfaceIQ)
  • Custom colors and bold statement sinks — darker composite sinks, fireclay farmhouse sinks, or stone-look sinks that stand out against lighter countertops, adding contrast and character. (Flavor365)

Examples: Great Sink Picks for Different Needs (2025)

Here are some sink options — from functional and budget-friendly to high-end and design-forward — that reflect current trends and different kitchen needs:

KRAUS Standart PRO 30 in. Undermount Single Bowl Stainless Steel Kitchen Sink

Modern Undermount

$523.19

KRAUS Kore Workstation Undermount Stainless Steel Kitchen Sink

Workstation / Functional

$604.88

SINKOLOGY Jackson 33 in. Drop-in Single Bowl Fireclay Kitchen Sink

Farmhouse Fireclay

$299.00

Allen + Roth Kaiden Double Equal Bowl Granite Composite Kitchen Sink

Composite Durable

$289.00

Glacier Bay 33 in. Drop-In Double Bowl Stainless Steel Kitchen Sink

Budget Stainless

$149.00

Signature Hardware Rowena 33″ Fireclay Farmhouse Kitchen Sink

Farmhouse Classic

$699.00

KOHLER Cursiva 33 in. Single Bowl Drop-In/Undermount Stainless Steel Kitchen Sink

Versatile Stainless

$399.00

ChokranBrass Unlacquered Copper Hammered Kitchen Sink

Unique Copper Statement

$386.05

Why these stand out


My Advice — How You, as a Homeowner or Decor Designer, Should Approach This Choice

Since you already think a lot about home style, budget, and how decor evolves — here’s how I’d suggest you choose:

  • Start with your kitchen’s overall style & vibe. Are you going for modern-minimalist, cozy farmhouse, transitional, or something eclectic? Let that guide sink shape, material, and finish.
  • Think about function and daily use. Do you cook a lot? Use big pots? Entertain? Then a deep single-bowl or a workstation sink might be worth investing in. If you seldom cook and use a dishwasher, simpler options may suffice.
  • Match sink and countertop / cabinet materials. Undermount sinks work best with solid countertops — so consider your countertop choice first (or vice versa). Cabinets may need reinforcement if you choose heavy sink materials (cast iron, fireclay, stone).
  • Balance budget and longevity. Stainless and composite sinks tend to be cost-effective and low-maintenance. If you love luxury finishes (fireclay, stone, copper), be ready for higher upfront cost and possibly more maintenance.
  • Think of the sink as decor. The trend in 2025 sees sinks not just as functional — but as part of the overall kitchen aesthetic. So treat it like another design element: an accent, a statement, part of the story your kitchen tells.

Final Thoughts

Your kitchen sink is more than a basin for dishes — it’s part of the foundation of your daily home life. Choosing the right sink means balancing your cooking habits, cleaning needs, kitchen style, and the kind of maintenance you’re willing to commit to.

I encourage you to treat the sink decision as a design decision, not just a functional one. Analyze what the kitchen needs and what you want it to say. With 2025’s trending shift toward durability, workstations, and statement pieces, the ideal sink is likely one that blends function with personal style.

Finding the Right Cabinets for Your Kitchen: What to Know Before You Buy

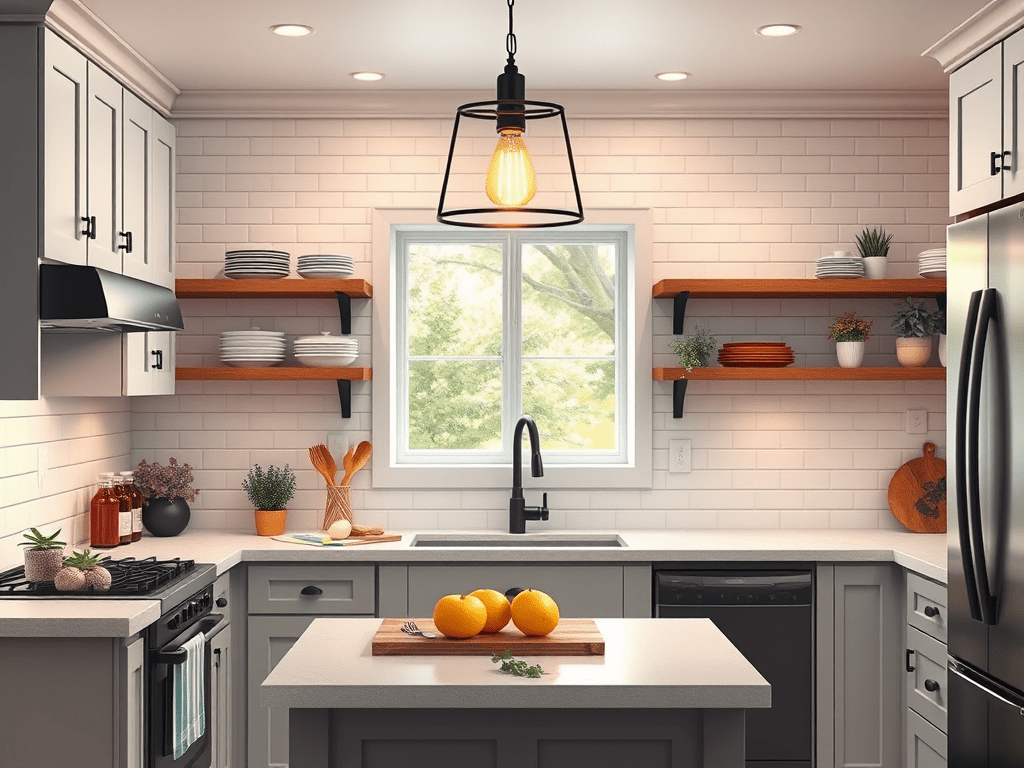
So, you’ve finally decided to demo your kitchen — exciting, right? Nothing says “fresh start” quite like the sound of old cabinets coming off the wall. But once the dust settles, one big question remains: what kind of cabinets should you buy?

Choosing the right cabinets isn’t just about style; it’s about creating a kitchen that fits your lifestyle, storage needs, and overall design vision. Whether you’re going for modern minimalism, cozy farmhouse, or timeless traditional, your cabinets set the tone for your entire space. Let’s walk through how to choose the right ones — from type to color — and why it all matters.


1. Start with the Type of Cabinets You Need

Before you fall in love with a color or door style, think about function. Ask yourself:

  • Do I want stock, semi-custom, or custom cabinets?
    • Stock cabinets are budget-friendly and available in standard sizes — perfect for quick remodels.
    • Semi-custom cabinets offer more flexibility in sizing, finishes, and storage options.
    • Custom cabinets are built specifically for your kitchen, ideal if you have a unique layout or specific vision.
  • How much storage do I need?
    • If you cook often, prioritize deep drawers, pull-out shelving, and hidden organizers.
    • For smaller kitchens, consider upper cabinets that go to the ceiling — maximizing every inch of space.

Your cabinet choice should make your kitchen work for you — not the other way around.


2. Choose the Right Cabinet Style

The cabinet door style is where your personal taste really shines. A few popular options include:

  • Shaker style: Clean, simple, and timeless — great for almost any design.
  • Flat-panel (slab) doors: Sleek and modern, ideal for contemporary kitchens.
  • Raised-panel doors: Classic and elegant, often found in traditional homes.
  • Glass-front doors: Perfect for showcasing dishware or adding an airy feel.

Think about how your cabinet style will complement other elements in your kitchen — like your backsplash, countertops, and flooring.


3. Picking the Perfect Cabinet Color

Color can completely transform your kitchen. It’s what creates mood and flow in the space. Here’s how to choose wisely:

  • Go light if your kitchen is small or lacks natural light. White, cream, or soft gray cabinets can make the room feel more open.
  • Go dark if you want drama or contrast. Navy, charcoal, or black cabinets pair beautifully with lighter countertops.
  • Mix it up with a two-tone look — white uppers and wood or colored lowers are a big trend that adds dimension and personality.

Before you commit, bring home samples and see how they look in your kitchen’s lighting. What seems perfect in the showroom may look completely different under your own lights.


4. Why It Matters Which Cabinets You Buy

Your cabinets are more than just storage — they’re a long-term investment in your home’s value and your daily happiness. High-quality cabinets hold up better over time, resist wear, and give your kitchen a polished, finished look.

Poorly made cabinets can warp, chip, and cause frustration every time you open a door or drawer. On the other hand, well-chosen cabinets make your kitchen both functional and beautiful — a space you actually enjoy spending time in.


Cabinet Brand Suggestions by Price Range

Here’s a breakdown of typical cabinet quality / budget tiers, and some brand suggestions for each. (Note: exact pricing will vary wildly based on size of the kitchen, finishes, installation, etc.)

1. Budget / Entry Level

  • What this means: Basic materials, ready-to-assemble or stock sizes, fewer finish/customization options. Good for smaller remodels or if budget is tight.
  • Brand examples:
    • IKEA KNOXHULT Base Cabinet — IKEA is commonly listed as a budget option. Coohom+1
    • Hampton Bay Base Cabinet — The brand Hampton Bay shows up as a budget friendly stock option. Lifestory Research+1
  • What to watch: Make sure materials (plywood vs particle board), hardware (soft-close, drawers) and durability are acceptable. Even on a budget you don’t want something that will fall apart.

2. Mid-Range / Semi-Custom

  • What this means: Better materials and construction (plywood boxes, better finishes), more color/door style options, possibly modifications to sizing.
  • Brand examples:
    • KraftMaid Fox Ridge Kitchen Cabinet — KraftMaid often listed in the mid-range / semi-custom space. BFP+1
    • Brands like Thomasville and Wellborn are also featured in “best mid-range” lists. Coohom+1
  • What to watch: Confirm what is included vs what is “upgrade” (for example, premium finish, built-in organizers). The mid-range often gives more flexibility for your style without fully custom costs.

3. High-End / Custom / Luxury

  • What this means: Fully custom builds, premium woods, artisan finishes, unique configurations, possibly luxury/imported lines.
  • Brand examples:
    • Brands such as Wood‑Mode, Poggenpohl, SieMatic are cited as luxury cabinet brands. Today’s Homeowner+1
  • What to watch: At this level you’re paying for craftsmanship, customization and long-term value. Make sure the investment aligns with your goals (resale, lifetime, “forever home”).

Final Thoughts

When you’re remodeling your kitchen, it’s easy to get caught up in the big picture — new floors, countertops, appliances. But your cabinets are truly the backbone of the space. Take your time, do your research, and invest in something that fits your lifestyle, taste, and budget.

The right cabinets don’t just store your dishes — they define your kitchen’s personality. So, before the next phase of your remodel begins, take a moment to envision how you want your kitchen to feel every time you walk in. That’s where your cabinet story begins.

DIY Kitchen Improvements: How to Update Your Kitchen on a Budget


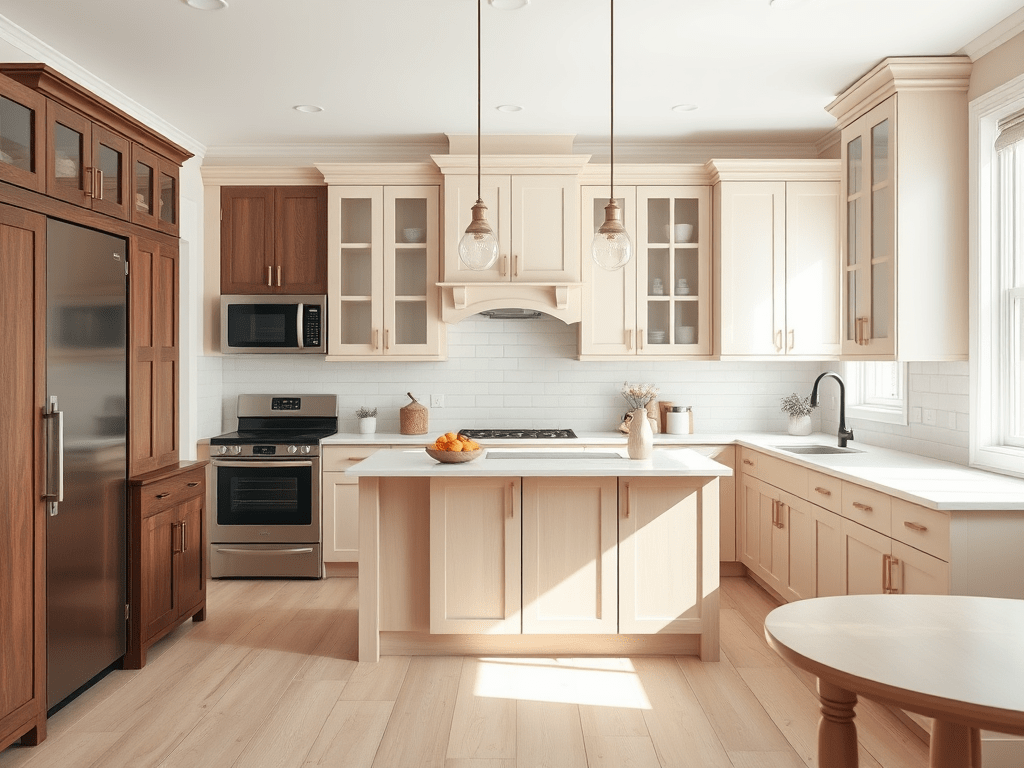
Your kitchen is the heart of your home—but it’s also one of the most expensive rooms to remodel. The good news? You don’t need a full renovation to make it look fresh, modern, and inviting. With a few budget-friendly DIY updates, you can completely transform your kitchen’s look and feel without spending thousands.

Here’s how to give your kitchen a stylish makeover while keeping costs low and creativity high.


1. Refresh Your Cabinets Instead of Replacing Them

New cabinets can eat up your entire renovation budget. Instead, consider a simple update: paint, new hardware, or open shelving.

  • Paint or stain your existing cabinets for an instant facelift. Light colors like white, cream, or soft gray can make your kitchen feel larger and brighter.
  • Swap out old handles and knobs for modern, matte black or brushed brass ones to give your kitchen an instant designer touch.
  • Remove a few cabinet doors to create open shelving—great for displaying pretty dishes, glassware, or plants.

💡 Pro Tip: Use a high-quality primer before painting cabinets for a long-lasting finish.


2. Update the Backsplash

A backsplash is one of the easiest ways to add personality to your kitchen. You don’t need to install tile yourself or hire a professional—there are many peel-and-stick backsplash options that look stunning and cost a fraction of the price.

Choose from styles like:

  • Faux subway tiles
  • Marble-inspired panels
  • Rustic brick patterns

They’re renter-friendly, easy to clean, and simple to apply in an afternoon.


3. Upgrade Lighting Fixtures

Lighting makes a huge difference in how your kitchen feels. Replace outdated fixtures with something fresh and modern—like a statement pendant light over your island or under-cabinet LED strips for extra brightness while cooking.

You can even spray paint existing fixtures with metallic or matte finishes for a new look on a small budget.


4. Add a Pop of Color with Paint or Wallpaper

A new coat of paint can instantly change the energy of your kitchen. Try an accent wall behind your dining nook or breakfast bar, or even removable wallpaper for a bold, patterned statement.

Popular color trends include:

  • Soft sage green
  • Dusty blue
  • Warm terracotta
  • Creamy off-white

5. DIY Open Shelving

Floating shelves are stylish, functional, and easy to build yourself. Use reclaimed wood for a rustic vibe or crisp white shelves for a clean, minimalist look.

Decorate them with:

  • Cookbooks
  • Potted herbs
  • Decorative bowls
  • Baskets for small storage

This adds warmth and character to your kitchen while helping you stay organized.


6. Replace or Cover Countertops

If your countertops are outdated, you can refresh them without replacing them. Try:

  • Countertop paint kits that mimic granite or marble.
  • Peel-and-stick countertop films for a quick and budget-friendly transformation.

These updates are temporary yet stylish, making them perfect for both homeowners and renters.


7. Decorate with Intention

Add finishing touches that bring your personality into the space:

  • A cozy rug near the sink or stove
  • A bowl of fresh fruit on the counter
  • Art prints or framed quotes on empty walls
  • A few potted plants for color and freshness

Sometimes, it’s the small decorative details that make the biggest difference.


8. Reorganize and Declutter

Before making any big changes, declutter your kitchen. A tidy, organized kitchen automatically feels newer and more inviting.
Use:

  • Drawer organizers
  • Clear storage bins for pantry goods
  • Decorative jars for flour, sugar, and coffee

This not only looks better but makes your kitchen more functional.


Final Thoughts

You don’t need a big renovation budget to create a kitchen you love. With paint, creativity, and a few DIY touches, you can completely transform your space and make it feel fresh again.

Remember: small improvements over time add up to a big impact. Whether you start with the cabinets or just add new lighting, every change brings you closer to the kitchen of your dreams—without breaking the bank.


Painting Your Space: A DIY Guide to Painting Your Home or Apartment for the First Time


There’s something magical about a fresh coat of paint. It can instantly transform a room, shift the mood of your space, and make your home feel more like you. If you’re about to paint your home or apartment for the very first time, don’t worry—it’s easier than it looks when you’re armed with the right tools, tricks, and mindset. This DIY guide will walk you through how to paint like a pro, even if you’ve never picked up a paint roller before.


Step 1: Choose Your Paint and Finish

Before you grab a brush, you’ll need to decide on two things: color and finish.

  • Color: Think about how you want the space to feel. Light colors can make rooms feel bigger and more open, while dark tones bring coziness and depth. Neutrals (like soft grays, whites, and beige) are versatile, but don’t be afraid to add a pop of personality with a bold accent wall.
  • Finish:
    • Matte/Flat: Great for hiding imperfections but not easy to clean.
    • Eggshell/Satin: Perfect for most rooms—slight sheen and wipeable.
    • Semi-Gloss/Gloss: Durable and easy to clean—best for kitchens, bathrooms, and trim.

Step 2: Gather Your Supplies

You don’t need a professional kit, just some basics:

  • Paint (and primer, if needed)
  • Paint tray & liners
  • Paint roller with extension pole
  • Angled paint brush for edges
  • Painter’s tape
  • Drop cloths or old sheets
  • Sandpaper and spackle for patching holes
  • A damp cloth for quick cleanups

Step 3: Prep the Room (This Is Key!)

The secret to a great paint job is in the preparation.

  1. Clear the space. Move furniture to the center or out of the room.
  2. Protect surfaces. Use drop cloths to cover floors and furniture.
  3. Tape edges. Apply painter’s tape around trim, outlets, and edges for clean lines.
  4. Clean the walls. Wipe down with a damp cloth to remove dust and grime.
  5. Patch holes. Fill small nail holes or cracks with spackle, sand smooth once dry.

Step 4: Prime (If Needed)

Primer isn’t always necessary, but it helps in certain cases:

  • If you’re painting over a dark color with a lighter one.
  • If your walls are stained or uneven.
  • If you’re painting fresh drywall.

A good primer ensures your paint color looks true and lasts longer.


Step 5: Paint Like a Pro

Now comes the fun part!

  1. Cut in first. Use your angled brush to paint along the edges, corners, and around trim. This creates a frame for your roller work.
  2. Roll in sections. Load your roller, start in a “W” or “M” shape, and then fill in. This avoids streaks.
  3. Work in thin coats. Two thinner coats are better than one heavy coat—less dripping, smoother finish.
  4. Let it dry. Follow the paint can instructions for drying times before applying the second coat.

Step 6: Finishing Touches

  • Remove painter’s tape before the paint fully dries to avoid peeling.
  • Touch up any small mistakes with your brush.
  • Clean your brushes and rollers right away (warm water for latex paint, mineral spirits for oil-based).

Tips & Tricks to Make It Easier

  • Use quality tape. Cheap tape can bleed and ruin your crisp edges.
  • Don’t overload your brush. A little goes a long way.
  • Keep a damp rag handy. Spills and drips happen—wipe them immediately.
  • Play music or a podcast. Painting is more fun when you set the mood.
  • Take your time. Rushing leads to streaks, drips, and missed spots.

Final Thoughts

Painting your home or apartment for the first time doesn’t have to be overwhelming. With a little prep, patience, and creativity, you’ll end up with a space that reflects your style and feels brand new. Whether you’re brightening a living room, creating a cozy bedroom vibe, or adding a bold accent wall, painting is one of the simplest (and most affordable) DIY projects with the biggest payoff.

So, grab that roller and get started—your dream space is just a coat of paint away.


DIY Your Dining Room: Simple Steps to Make It Uniquely Yours


www.discoveringlifellc.com | Discover Your Style. Love Your Home.

When it comes to home decorating, the dining room often gets overlooked. It’s easy to let it become a space that’s “good enough” — a table, some chairs, maybe a centerpiece if you’re feeling fancy. But your dining room deserves more than that. It’s where you gather with friends, celebrate holidays, and enjoy meals with family. With a little creativity and a few DIY touches, you can transform your dining room into a space that reflects your style and feels truly welcoming.

Here’s how to DIY your dining room — no full remodel or big budget required.


1. Start with a Vision (and a Vibe)

Before grabbing a paintbrush or scouring thrift stores, define the vibe you want for your dining room. Do you want it to feel cozy and rustic? Light and airy? Elegant and dramatic? Your answer will guide every DIY decision — from colors to materials to layout.

Tip: Make a mood board on Pinterest or use a printable worksheet to define your home style. (You can grab our free Find Your Home Style worksheet here).


2. Paint Goes a Long Way

One of the easiest and most budget-friendly DIY updates is paint. Consider:

  • Bold accent walls for a pop of color
  • Two-tone walls with chair rail molding
  • Moody dark hues for an intimate, dramatic look
  • Crisp whites or pastels for an airy, modern farmhouse feel

3. DIY Your Dining Table or Chairs

Don’t toss your old furniture just yet! You can:

  • Refinish your dining table with a new stain or paint color
  • Reupholster chair seats with fresh fabric (great way to add color or pattern)
  • Mismatched chairs? Paint them all the same color for a cohesive DIY look

4. Create Your Own Wall Art or Gallery Wall

Turn your blank dining room walls into a personal gallery. You can:

  • Frame pages from vintage cookbooks or botanical prints
  • Print and hang black-and-white family recipes
  • Create a DIY photo ledge with thrifted frames
  • Make a chalkboard wall or menu board — both decorative and useful

5. Switch Up Lighting

Swap out the standard builder-grade light for something that fits your personality:

  • DIY pendant light with a woven basket or metal shade
  • Paint or refinish an old chandelier
  • Use plug-in sconces for ambient lighting (no electrician needed)

6. Add a DIY Centerpiece or Table Runner

Centerpieces don’t have to be fancy or expensive. Try:

  • A simple wood tray filled with seasonal items (candles, mini pumpkins, pinecones)
  • A linen or burlap table runner you make or repurpose from fabric
  • Glass jars with wildflowers, eucalyptus, or fresh herbs for a natural vibe

7. Make Use of Storage as Decor

Got an empty corner? A thrifted hutch or buffet can be both functional and beautiful. Paint it to match your theme and use it to display:

  • Dishes
  • Seasonal decor
  • Table linens
  • DIY wine rack or glass holders

8. Incorporate Texture and Layers

A welcoming dining space often includes texture:

  • Hang woven baskets or macramé on the wall
  • Use rugs under the table to ground the space
  • Drape throws over chairs for cozy, layered looks

Final Thoughts: It’s Your Dining Room — Make It Yours

You don’t need to follow a rulebook or spend thousands to have a beautiful dining room. A few DIY updates can change the entire feel of the space and make it uniquely yours. Whether you paint a wall, refinish a thrift store table, or just change the lighting — you’re creating a place for real moments and meaningful memories.


Want help designing your space? Follow us on Pinterest @DiscoveringLifeLLC for real-life inspiration and share your DIY dining room makeover using !