Finding the Perfect Throw Blanket: Cozy Comfort Meets Home Style

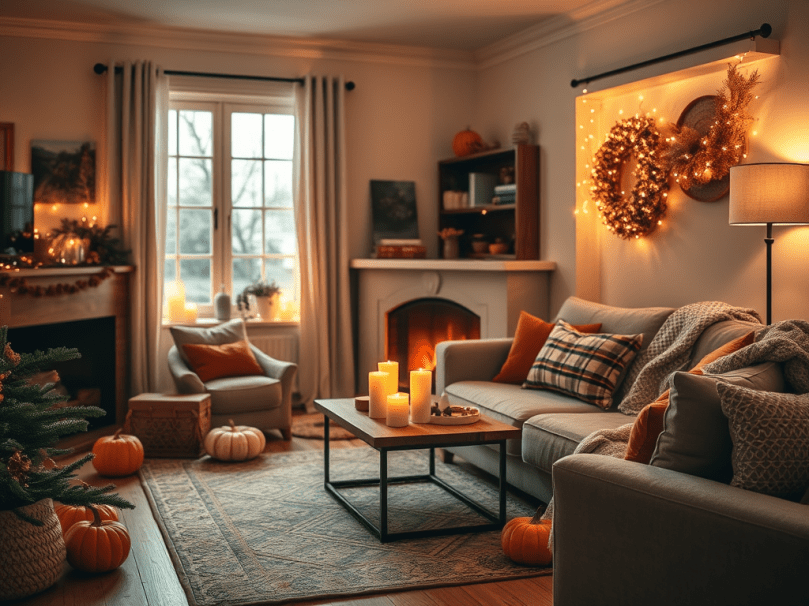
As the days grow shorter and the air turns crisp, there’s one home essential that suddenly becomes irresistible: the throw blanket. It’s that magical piece of decor that not only keeps you warm but somehow manages to pull an entire room together. Whether you’re curling up on the couch with a cup of cocoa or layering your bed for extra warmth, the right throw blanket is both comfort and style wrapped in one soft, cozy package.

But with so many textures, colors, and brands out there, how do you find the perfect one for your home? Let’s break it down—then I’ll share a little story about how I accidentally found my dream throw blanket (and almost started a snowball fight in the process).


How to Choose the Right Throw Blanket for Your Home

1. Think about your purpose.
Are you looking for something purely decorative, or do you want a blanket you can snuggle under during movie night?

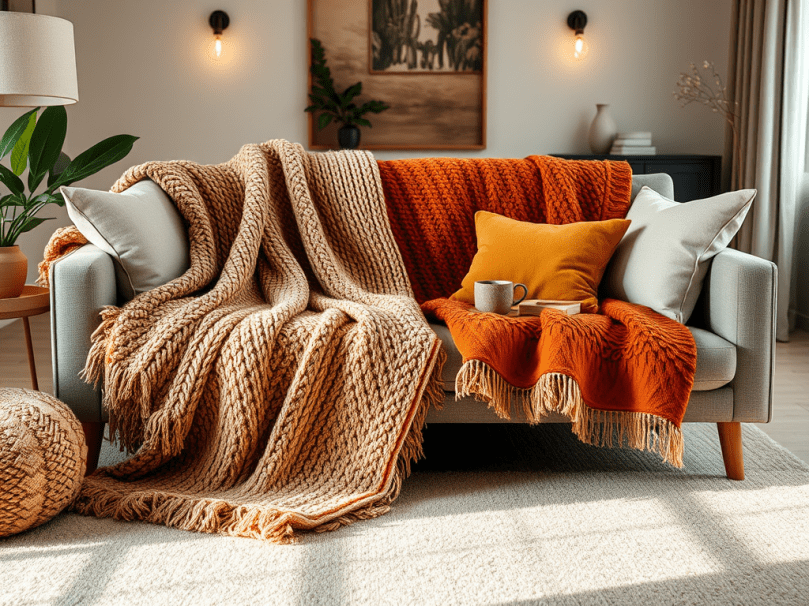
  • Decorative throws often come in lighter fabrics like cotton or linen blends and are meant to complement your sofa or bedding.
  • Functional throws are thicker—think fleece, sherpa, wool, or chunky knit—and are designed to keep you warm.

2. Consider the material.
Each material has its own vibe:

  • Cotton: Breathable and easy to clean, great for everyday use.
  • Wool: Warm, natural, and perfect for chilly winter nights.
  • Sherpa or fleece: Soft and plush—ideal for wrapping yourself up like a burrito.
  • Chunky knit or faux fur: Adds a luxurious, textured touch to your decor.

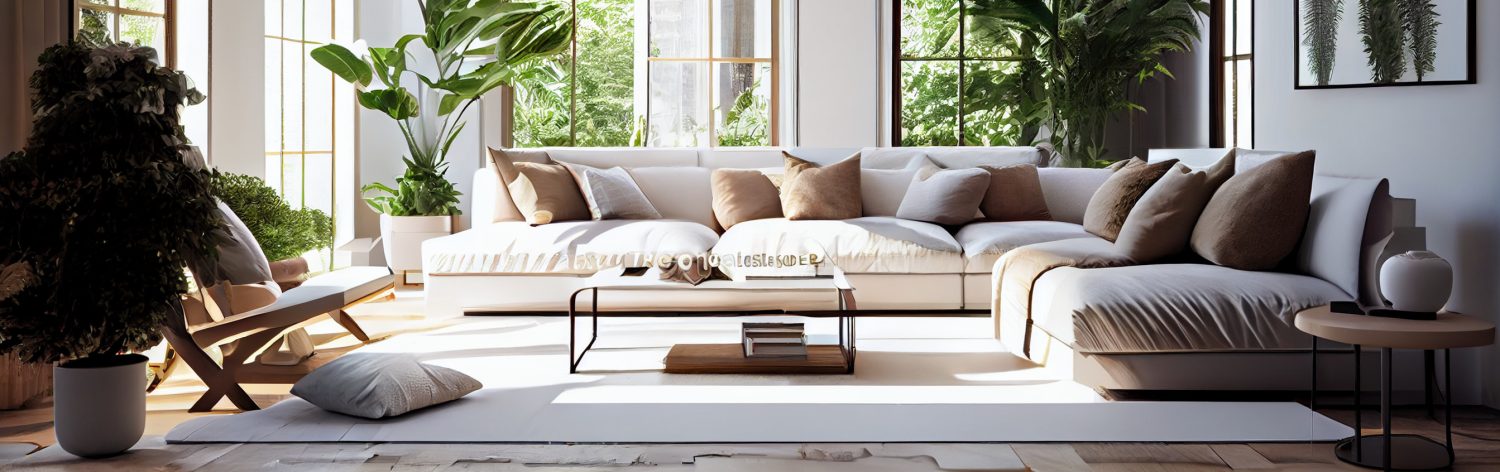
3. Match your home’s aesthetic.
If your decor is minimalist, go for solid neutrals or soft earth tones. For a boho look, consider tassels, patterns, or woven textures. And if your home leans modern or glam, faux fur or velvet throws can elevate the space instantly.


Best Throw Blanket Brands Worth Snuggling With

  • Barefoot Dreams: Famous for their ultra-soft, buttery fabric—luxury comfort at its best.
  • Brooklinen: Offers a great balance between style and coziness, with gorgeous neutral tones.
  • Ugg Home: Known for their sherpa and plush styles that practically beg for nap time.
  • Pottery Barn: Beautiful, durable, and versatile options to fit any decor theme.
  • Target’s Threshold Line: Affordable, trendy, and surprisingly high quality—perfect for seasonal updates.

Best Color Choices for Throw Blankets

  • Neutrals (Beige, Gray, Cream): Timeless and easy to blend with any decor style.
  • Warm Earth Tones (Terracotta, Mustard, Olive): Perfect for fall and winter, adding cozy warmth to your living space.
  • Deep Jewel Tones (Navy, Emerald, Burgundy): Rich colors that make your space feel elegant and inviting.
  • Soft Pastels (Blush, Sage, Sky Blue): Great for brightening a neutral room and adding a touch of charm.

If you’re someone who likes to rotate your decor with the seasons, keep a few different throws on hand—light ones for spring and summer, and plush, thick ones for fall and winter.


A Cozy (and Funny) Story About Finding My Perfect Throw Blanket

Last winter, I decided it was time to find the perfect throw blanket. You know, the one that’s soft enough to make you forget all your responsibilities but stylish enough to look like you have your life together.

After hours of browsing online, I convinced myself that I needed to feel the fabric in person—because you can’t exactly touch-test through a screen. So off I went to the store.

I spotted a display of sherpa throws and reached for one just as another shopper did. We both froze, gripping opposite corners like it was a holiday sale standoff. She laughed and said, “You can have it if you promise not to hog the remote when you get home.”

We both cracked up, and it turned out there were more in the back (thankfully). I brought mine home, threw it over the couch, and it instantly became everyone’s favorite spot in the house—dog included.

Moral of the story? The right throw blanket isn’t just about warmth—it’s about comfort, laughter, and the memories you make under it.


Final Thoughts

Throw blankets aren’t just accessories; they’re comfort statements. They tell a story about your style, your home, and those quiet, cozy moments you treasure. So as the temperatures drop, find one (or two) that make your space feel like a warm hug.

Because let’s be honest—there’s no such thing as too many throw blankets.


DIY Kitchen Improvements: How to Update Your Kitchen on a Budget


Your kitchen is the heart of your home—but it’s also one of the most expensive rooms to remodel. The good news? You don’t need a full renovation to make it look fresh, modern, and inviting. With a few budget-friendly DIY updates, you can completely transform your kitchen’s look and feel without spending thousands.

Here’s how to give your kitchen a stylish makeover while keeping costs low and creativity high.


1. Refresh Your Cabinets Instead of Replacing Them

New cabinets can eat up your entire renovation budget. Instead, consider a simple update: paint, new hardware, or open shelving.

  • Paint or stain your existing cabinets for an instant facelift. Light colors like white, cream, or soft gray can make your kitchen feel larger and brighter.
  • Swap out old handles and knobs for modern, matte black or brushed brass ones to give your kitchen an instant designer touch.
  • Remove a few cabinet doors to create open shelving—great for displaying pretty dishes, glassware, or plants.

💡 Pro Tip: Use a high-quality primer before painting cabinets for a long-lasting finish.


2. Update the Backsplash

A backsplash is one of the easiest ways to add personality to your kitchen. You don’t need to install tile yourself or hire a professional—there are many peel-and-stick backsplash options that look stunning and cost a fraction of the price.

Choose from styles like:

  • Faux subway tiles
  • Marble-inspired panels
  • Rustic brick patterns

They’re renter-friendly, easy to clean, and simple to apply in an afternoon.


3. Upgrade Lighting Fixtures

Lighting makes a huge difference in how your kitchen feels. Replace outdated fixtures with something fresh and modern—like a statement pendant light over your island or under-cabinet LED strips for extra brightness while cooking.

You can even spray paint existing fixtures with metallic or matte finishes for a new look on a small budget.


4. Add a Pop of Color with Paint or Wallpaper

A new coat of paint can instantly change the energy of your kitchen. Try an accent wall behind your dining nook or breakfast bar, or even removable wallpaper for a bold, patterned statement.

Popular color trends include:

  • Soft sage green
  • Dusty blue
  • Warm terracotta
  • Creamy off-white

5. DIY Open Shelving

Floating shelves are stylish, functional, and easy to build yourself. Use reclaimed wood for a rustic vibe or crisp white shelves for a clean, minimalist look.

Decorate them with:

  • Cookbooks
  • Potted herbs
  • Decorative bowls
  • Baskets for small storage

This adds warmth and character to your kitchen while helping you stay organized.


6. Replace or Cover Countertops

If your countertops are outdated, you can refresh them without replacing them. Try:

  • Countertop paint kits that mimic granite or marble.
  • Peel-and-stick countertop films for a quick and budget-friendly transformation.

These updates are temporary yet stylish, making them perfect for both homeowners and renters.


7. Decorate with Intention

Add finishing touches that bring your personality into the space:

  • A cozy rug near the sink or stove
  • A bowl of fresh fruit on the counter
  • Art prints or framed quotes on empty walls
  • A few potted plants for color and freshness

Sometimes, it’s the small decorative details that make the biggest difference.


8. Reorganize and Declutter

Before making any big changes, declutter your kitchen. A tidy, organized kitchen automatically feels newer and more inviting.
Use:

  • Drawer organizers
  • Clear storage bins for pantry goods
  • Decorative jars for flour, sugar, and coffee

This not only looks better but makes your kitchen more functional.


Final Thoughts

You don’t need a big renovation budget to create a kitchen you love. With paint, creativity, and a few DIY touches, you can completely transform your space and make it feel fresh again.

Remember: small improvements over time add up to a big impact. Whether you start with the cabinets or just add new lighting, every change brings you closer to the kitchen of your dreams—without breaking the bank.


Preparing Your Home for the Holidays: How Early Is Too Early?


The holidays seem to sneak up faster every year. One moment it’s pumpkins and sweater weather, and the next, stores are decked out in twinkling lights and Christmas trees. It’s enough to make anyone wonder — how early is too early to start decorating for the holidays?

Truthfully, there’s no one-size-fits-all answer. Preparing your home for the holidays is as much about feeling festive and cozy as it is about timing. But let’s break it down and find the perfect balance between enjoying fall’s last moments and welcoming holiday cheer.


How Early Is Too Early to Decorate?

For some, holiday decorating begins the day after Halloween. For others, it doesn’t feel right until after Thanksgiving dinner. The “right” time really depends on your personal preference — and maybe your tolerance for glitter and garlands.

If decking the halls early brings you joy, go for it! Life’s too short to save your favorite decor for only a few short weeks. However, if you like savoring each season, consider easing into it. Try adding subtle touches like cozy blankets, candles with hints of pine or cinnamon, or soft string lights before going full-on Christmas mode.

A good rule of thumb?
Start planning early, start decorating when it feels right.


What Should You Do First?

If you’re ready to prepare your home for the holidays but don’t know where to start, here’s a simple step-by-step guide:

  1. Declutter and Clean: Before adding anything new, clear out unnecessary clutter. A clean space will make decorating easier and more enjoyable.
  2. Check Your Decor: Pull out last year’s decorations and see what needs fixing, replacing, or refreshing.
  3. Plan a Theme: Do you want a traditional red and green vibe, or something more modern like silver and white? Having a plan helps keep your home cohesive.
  4. Start with Lighting: Warm lights instantly set a holiday tone, whether they’re wrapped around a tree, draped across a mantel, or twinkling in the window.
  5. Add Layers: Incorporate textiles like festive throw pillows, cozy blankets, or even new curtains for a soft seasonal touch.
  6. Finish with Details: Once your main decor is up, add finishing touches like candles, greenery, or table settings to tie everything together.

Is Thanksgiving a Holiday That Needs Decorations?

Thanksgiving definitely deserves its own moment — but that doesn’t mean you have to go overboard. A few fall-inspired touches can go a long way: think neutral tones, a warm centerpiece, or rustic table decor.

You can also make Thanksgiving your transition holiday. Blend autumn and winter elements — for example, pair pumpkins with evergreen sprigs, or use metallic accents with your earthy tones. It’s a smooth way to shift from fall coziness to holiday sparkle.


Should You Care What People Think About Decorating Early?

Absolutely not. Your home should make you feel good — not the neighbors, not social media, not even your in-laws. If decorating early helps you feel festive, calm, or excited, that’s what matters.

The holidays are about joy, comfort, and connection. Whether your tree goes up in November or December, what’s important is that your home feels welcoming and warm for the season ahead.


Final Thoughts

Preparing your home for the holidays is more about mindset than a calendar date. Start when it feels right for you, focus on creating an atmosphere that brings comfort and joy, and don’t be afraid to mix traditions or create new ones.

At the end of the day, the holidays are what you make them — so light that candle, hang that wreath, and let your home reflect the magic of the season, whenever you’re ready for it.


Repurposing Your Dining Room Table: How to Upgrade Your Dining Room Without Replacing Your Furniture


When it comes to refreshing your dining room, you don’t always have to start from scratch. Sometimes, the biggest transformation comes from reimagining what you already own. Your dining room table — the heart of so many family meals, celebrations, and conversations — can easily be repurposed or restyled to give your space a brand-new look without spending a fortune.

Here’s how you can upgrade your dining room without replacing your furniture.


1. Give Your Table a Makeover

Before you consider buying something new, take a close look at your dining table. Could a little DIY magic bring it back to life?

  • Refinish or paint it: Sand it down and stain it in a new color for a rustic farmhouse look, or paint it in a bold hue like navy, charcoal, or forest green for a modern upgrade.
  • Try a two-tone finish: Paint the base and legs while keeping the top wood-stained for a custom, designer-inspired contrast.
  • Add texture: Consider applying a peel-and-stick faux marble top or wood veneer to completely change the table’s appearance without replacing it.

2. Change the Chairs, Not the Table

Sometimes, the simplest way to upgrade your dining room is by mixing up the seating.

  • Swap out a few chairs: Replace the end chairs with upholstered ones for a more formal, mixed-material style.
  • Add a bench: A wooden or upholstered bench adds charm and functionality, especially for family-friendly spaces.
  • Reupholster your current chairs: New fabric or slipcovers can completely transform the room’s tone.

This approach keeps your existing table as the centerpiece while giving the whole space a modern refresh.


3. Switch Up Your Lighting

Lighting has a huge impact on how your dining table looks and feels.

  • Replace your chandelier or pendant light with something more in tune with your style — whether it’s industrial, minimalist, or glam.
  • Try dimmable bulbs or smart lighting to set the perfect mood for dinners or cozy evenings.
  • Add wall sconces or a nearby floor lamp for layered lighting that highlights your table beautifully.

4. Redecorate the Tabletop

Your dining table doesn’t have to stay bare or only serve meals — styling it is one of the easiest ways to upgrade your room.

  • Add a runner: A simple linen or patterned runner creates visual interest and texture.
  • Use statement centerpieces: Think ceramic vases, greenery, candles, or seasonal décor that can be swapped out through the year.
  • Play with height and layers: Stack trays, use decorative bowls, or layer placemats for a curated look that feels intentional and stylish.

5. Rearrange and Reimagine the Space

Sometimes, repurposing is all about perspective. Try rethinking how you use your dining area.

  • Reposition your table: Angle it differently or center it under your light fixture to change the room’s flow.
  • Add a rug: A new area rug can completely shift the visual tone — go bold with pattern or soft with a neutral woven texture.
  • Repurpose your table’s function: If you don’t use your dining area often, transform your table into a multi-use space — like a home office, craft station, or homework area during the day.

6. Upgrade the Surroundings

Don’t forget the environment around your dining table!

  • Refresh the walls: Add new art, wall shelves, or even a bold accent color behind your table.
  • Change your curtains or blinds: New window treatments can add warmth or brightness, depending on your style.
  • Decorate with greenery: A few plants can bring life and freshness to your dining area instantly.

Final Thoughts

You don’t need a brand-new dining set to make your dining room feel brand new. Repurposing your dining room table — whether through refinishing, restyling, or rethinking its use — is an affordable and creative way to upgrade your home. Sometimes, all it takes is a few design tweaks to make your old furniture feel like it belongs in a whole new space.


Tip: Take a “before and after” photo of your dining room. You’ll be amazed by how much difference small changes can make — and it might just inspire your next DIY project!


Why We Love Ranch-Style Homes: America’s Favorite Home Design


If there’s one home style that defines American living, it’s the ranch-style home. Spread across suburbs, small towns, and even the countryside, ranch homes have become an unmistakable symbol of comfort, practicality, and timeless design. But where did this beloved style come from, and why do so many of us still choose it today?

Let’s take a look at what makes the ranch-style home the most common—and most cherished—style in America.


Where the Ranch Style Came From

Ranch-style homes first gained popularity in the 1920s and 1930s, inspired by the simple, sprawling houses built on Western ranches. Their design drew from Spanish colonial architecture, with long, low layouts and open floor plans suited to the wide-open spaces of the American West.

But it was after World War II that the style truly took off. As soldiers returned home and the suburbs expanded, families wanted affordable, single-story homes that offered both practicality and freedom of movement. The ranch home—open, casual, and family-friendly—was the perfect fit.

By the 1950s and 1960s, the ranch-style home became the defining architecture of suburban America.


Why We Still Choose Ranch-Style Homes Today

Even with the rise of modern and contemporary designs, ranch homes continue to hold a special place in American hearts. Here’s why:

  1. Single-Level Living – Everything is on one floor, making it ideal for families, retirees, and anyone who values easy mobility.
  2. Open Concept Layout – The natural flow between kitchen, dining, and living spaces creates a warm, social atmosphere perfect for gatherings.
  3. Indoor-Outdoor Connection – Large windows, sliding glass doors, and patios make ranch homes feel airy and connected to nature.
  4. Flexibility for Updates – Their simple structure makes renovations and additions easy, whether you’re adding a sunroom, expanding the kitchen, or opening up more space.
  5. Timeless Appeal – Ranch homes are classic without feeling dated, blending comfortably with both modern and traditional decor.

In essence, a ranch-style home offers simplicity, accessibility, and comfort—three things that never go out of style.


How to Dress Up a Ranch-Style Home

The beauty of a ranch home is that it can evolve with your personal style. Whether you prefer modern farmhouse, mid-century, or cozy cottage vibes, a ranch layout provides the perfect canvas.

Here are a few ways to make it your own:

  • Play Up the Curb Appeal – Add a welcoming front porch, bold shutters, or updated lighting to create personality from the outside in.
  • Open Up the Space – If your ranch still has walls dividing the kitchen and living areas, consider opening them up to highlight that airy flow the style is known for.
  • Bring Nature In – Use large plants, natural wood finishes, and light curtains to enhance the home’s connection to the outdoors.
  • Highlight the Horizontal Lines – Embrace the long, low architecture with wide furniture, low-profile sofas, or horizontal artwork.
  • Add Modern Touches – Update hardware, fixtures, and color palettes for a more contemporary feel while keeping the home’s original charm.

Why We Love It

At its heart, the ranch home represents the American dream of comfort and space. It’s relaxed, unpretentious, and incredibly adaptable—just like the people who call it home. It welcomes guests easily, allows families to spread out, and creates a sense of connection that’s hard to find elsewhere.

We love it because it feels familiar. It feels like home.


In the end, a ranch-style home isn’t just about design—it’s about lifestyle. It’s the perfect mix of tradition and versatility, offering a foundation for families, dreamers, and anyone who wants a space that grows with them.

So whether you’re restoring an old ranch or designing one with a modern twist, remember: its charm lies in its simplicity—and in the freedom to make it uniquely yours.