How to Improve Lighting in a Dark Space (Without Overcrowding Your Home)


Dark rooms can feel cozy—but they can also feel cramped, heavy, and uninspiring if the lighting isn’t working in your favor. Whether you’re dealing with a room that lacks natural light or a space that just feels dim no matter the time of day, improving your lighting doesn’t mean filling every corner with lamps.

The goal is to maximize light intentionally, not overwhelm your space. Here’s how to make your home feel brighter, lighter, and more open—without overdoing it.


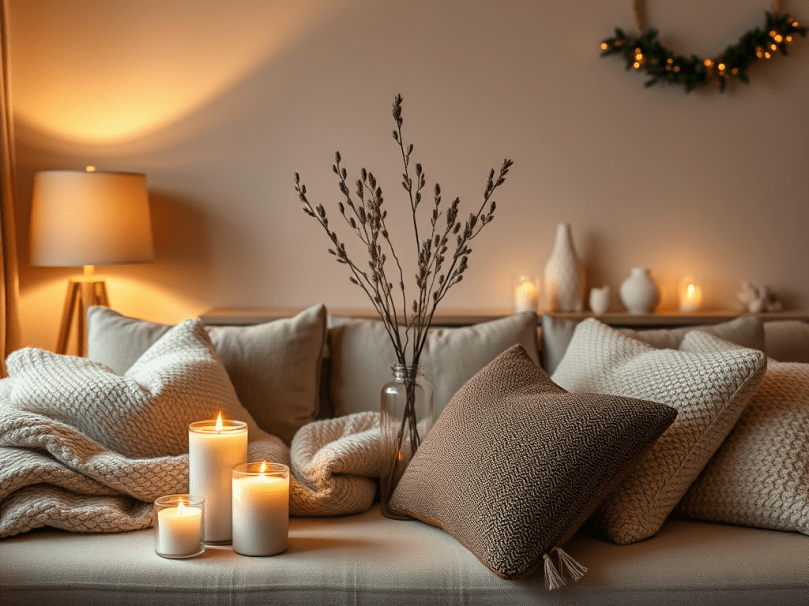
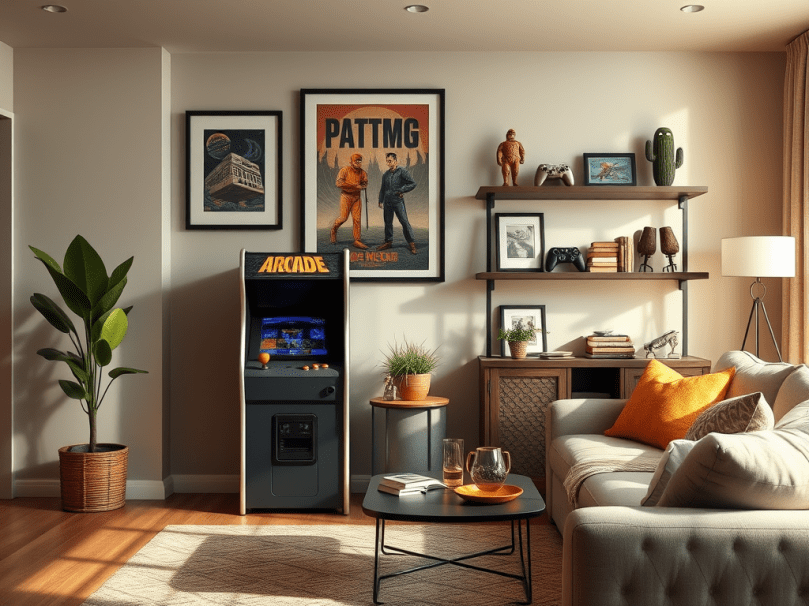
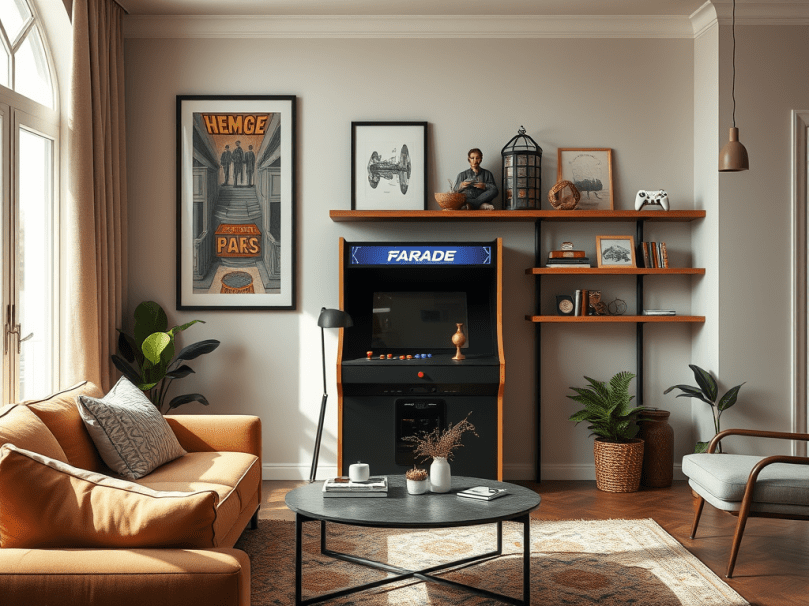
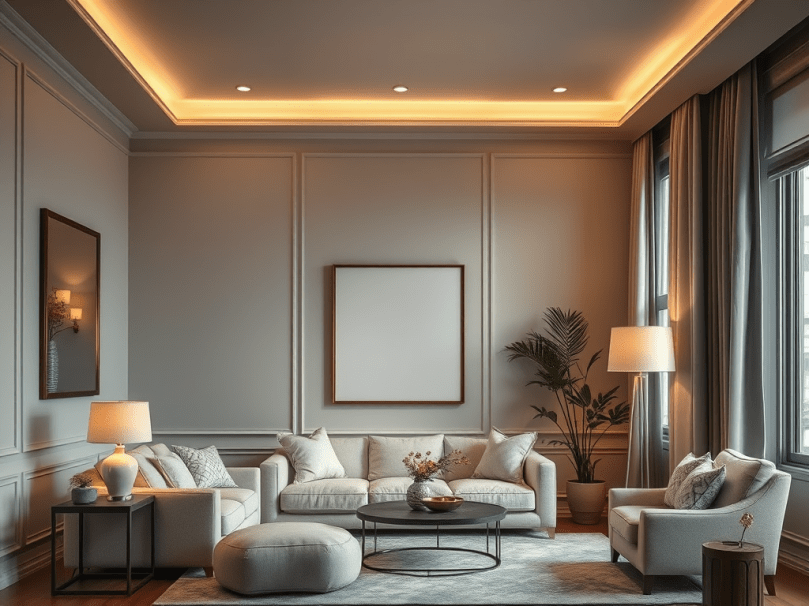
1. Layer Your Lighting (Instead of Relying on One Source)

One overhead light isn’t enough—especially in a dark space. The secret to brighter rooms is layered lighting, which creates depth and balance.

Aim for a mix of:

  • Ambient lighting: Your main light source (ceiling fixtures, flush mounts)
  • Task lighting: Focused light for function (table lamps, floor lamps, under-cabinet lighting)
  • Accent lighting: Soft highlights (wall sconces, LED strips, picture lights)

Layering allows you to spread light evenly throughout the room without needing harsh or oversized fixtures.


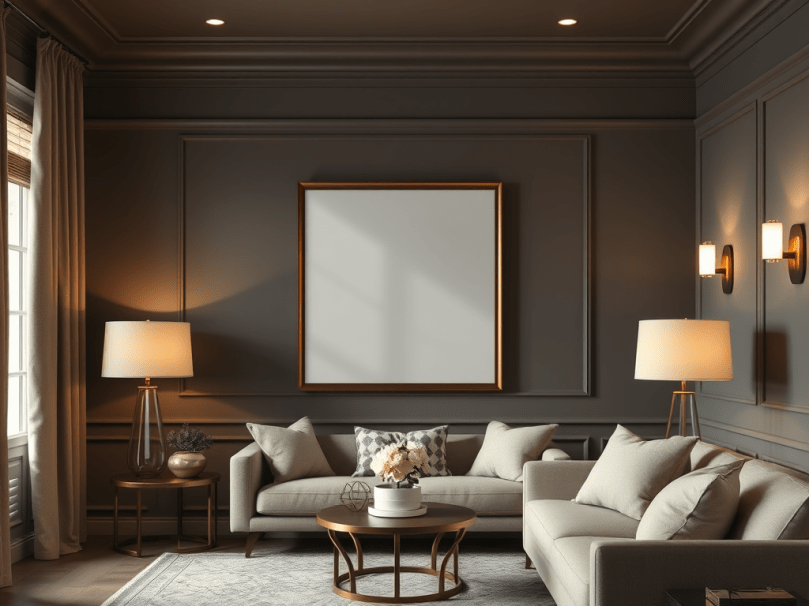
2. Choose the Right Bulb Temperature

Not all light bulbs are created equal. In darker spaces, the wrong bulb temperature can make the room feel dull or cold.

  • Opt for soft white to warm white (2700K–3000K) for living rooms and bedrooms
  • Use neutral white (3500K–4000K) in kitchens or workspaces that need clarity

Avoid mixing too many temperatures in one room—it can create visual clutter and uneven lighting.


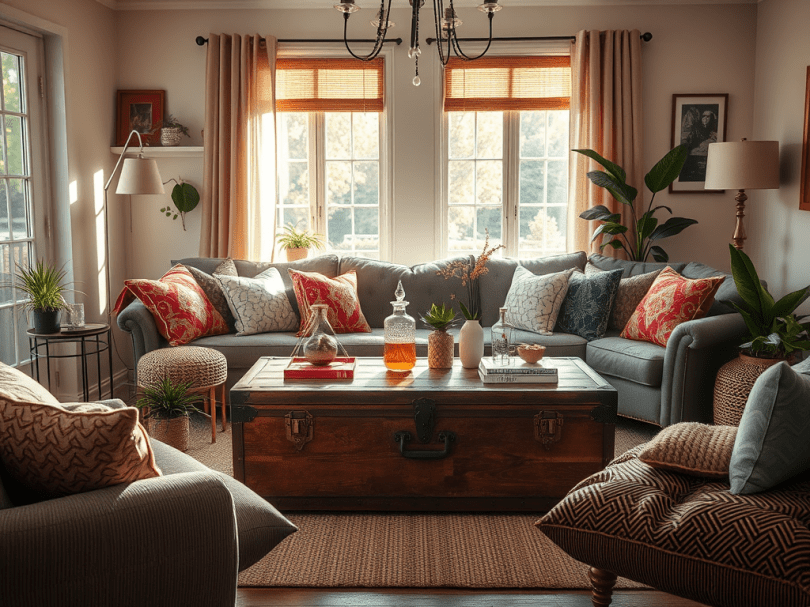
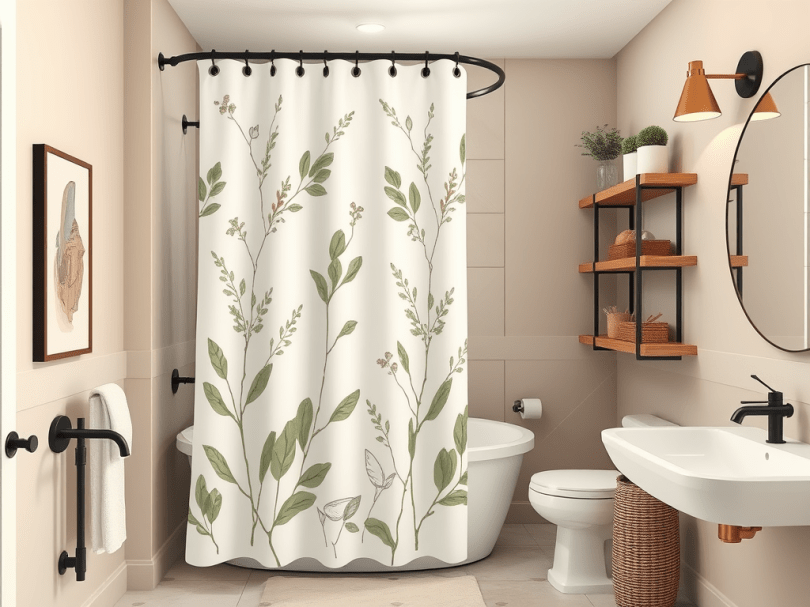
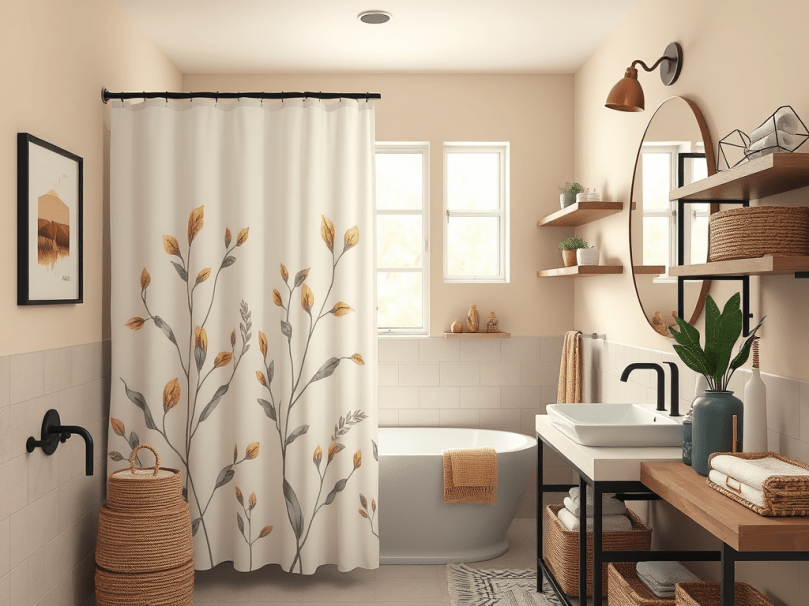
3. Use Reflective Surfaces to Multiply Light

One of the easiest ways to brighten a dark room is to let light bounce around.

Try incorporating:

  • Mirrors (especially across from windows or light sources)
  • Glass or acrylic decor
  • Metallic accents in warm finishes like brass or gold
  • Glossy or satin paint finishes on walls or trim

These elements help distribute light naturally, making the space feel brighter without adding more fixtures.


4. Rethink Lampshades and Fixtures

Heavy or dark lampshades can absorb light rather than distribute it.

Instead:

  • Choose light-colored or sheer shades
  • Look for open or exposed-base fixtures
  • Avoid bulky designs that visually weigh the room down

A simple switch in lampshade style can instantly improve how light flows through the space.


5. Use Wall Lighting to Free Up Floor Space

If you’re worried about clutter, wall-mounted lighting is your best friend.

Consider:

  • Wall sconces in living rooms or hallways
  • Plug-in sconces for renters
  • Picture lights above artwork
  • Slim-profile LED strips under shelves or cabinets

Wall lighting keeps the room feeling open while adding intentional brightness exactly where you need it.


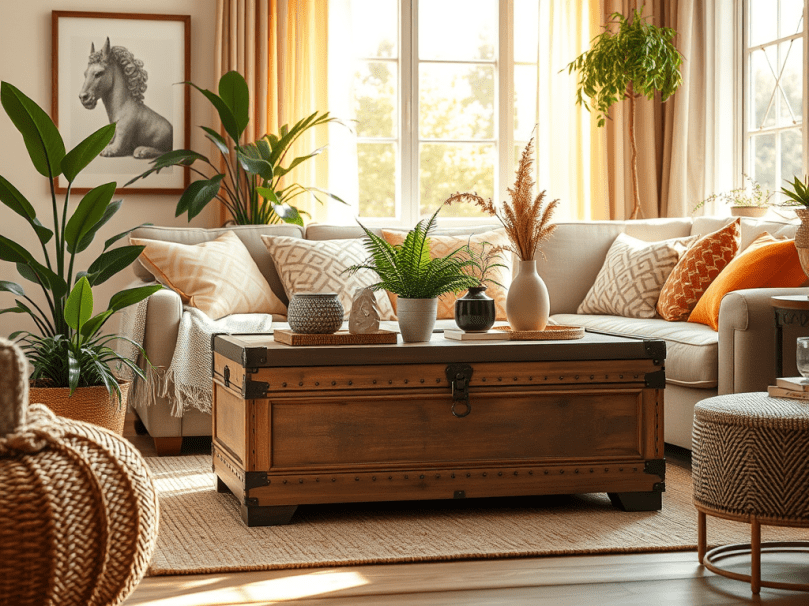
6. Keep Your Color Palette Light (But Not Bland)

Dark spaces benefit from lighter tones—but that doesn’t mean everything has to be white.

Use:

  • Soft neutrals like warm beige, greige, or light taupe
  • Light wood finishes
  • Muted pastels for subtle brightness

Pairing a light color palette with thoughtful lighting helps amplify brightness without washing out your style.


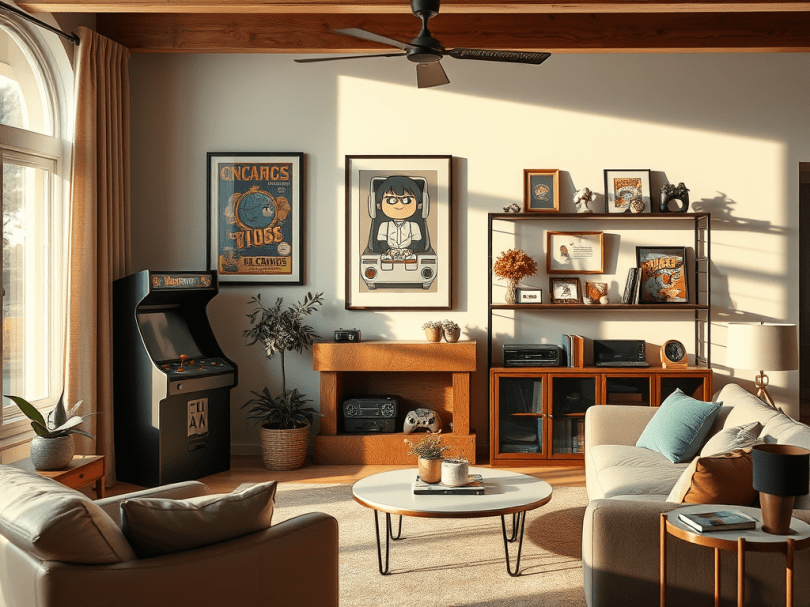
7. Declutter Areas That Block Light Flow

Sometimes the problem isn’t lighting—it’s what’s in the way.

Check for:

  • Tall furniture blocking windows
  • Overcrowded shelves
  • Dark, heavy curtains

Swap heavy drapes for sheer or light-filtering curtains, and rearrange furniture so light can travel freely throughout the room.


8. Use Dimmers to Control Mood and Brightness

Adding dimmers gives you flexibility without adding more lights.

Dimmers allow you to:

  • Adjust brightness throughout the day
  • Avoid harsh lighting at night
  • Make small rooms feel more intentional and cozy

They’re a subtle upgrade with a big impact.


Final Thoughts: Bright Doesn’t Mean Busy

A well-lit home isn’t about how many lights you have—it’s about how strategically you use them. By layering light, choosing the right finishes, and letting your space work with the light you already have, even the darkest room can feel open, airy, and inviting.

The key is balance: thoughtful lighting choices that enhance your home, not overwhelm it.


When the Holidays Are Over: How to Fill the Cozy Void After Decorations Come Down


There’s a moment every year—usually right after the last ornament is packed away—when the house feels… quiet. The twinkle lights are gone. The garland no longer frames the doorway. The glow that made evenings feel magical has disappeared overnight.

If you’ve ever stood in your living room after taking down holiday décor and thought, Why does my home suddenly feel empty?—you’re not alone.

The holidays bring more than decorations; they bring warmth, intention, and a sense of comfort that’s hard to let go of. But once the season ends, your home doesn’t have to feel bare or uninspired. That “post-holiday void” is actually an opportunity to reset your space and create a different kind of cozy—one that lasts all winter long.

Why Your Home Feels So Different After the Holidays

Holiday décor does something special:

  • It adds layers (lights, textures, greenery)
  • It creates soft lighting
  • It brings in sentimental and comforting elements

When those things are removed all at once, the space can feel colder, flatter, and less inviting. The key to filling that void isn’t replacing Christmas decorations—it’s replacing the feeling they created.

Start With Warm Lighting

One of the biggest losses after the holidays is ambient light. Twinkle lights and candles make a home feel instantly welcoming.

Try this instead:

  • Keep string lights up, but style them differently (inside lanterns, on shelves, or in glass jars)
  • Swap bright white bulbs for warm-toned bulbs
  • Add table lamps or floor lamps where overhead lighting once dominated
  • Use flameless candles for everyday glow without the holiday theme

Lighting alone can completely shift the mood of a room.

Bring In Cozy Textures

Holiday décor often includes plush throws, soft pillows, and layered fabrics. When those go away, rooms can feel unfinished.

Replace them with:

  • Neutral or winter-toned throw blankets
  • Textured pillows (knit, faux fur, boucle, or linen)
  • Area rugs to ground the space and add warmth underfoot

Think less “seasonal” and more “comfort-driven.”

Use Nature—Without the Holiday Theme

Greenery doesn’t have to disappear just because the holidays are over.

Try styling:

  • Dried eucalyptus or olive branches
  • Simple faux greenery stems in ceramic vases
  • Pinecones, wood beads, or stone accents
  • Bare branches in tall vases for a minimalist winter look

These elements keep your home feeling alive without leaning into holiday-specific décor.

Refresh Instead of Replace

The post-holiday season is the perfect time for a subtle refresh—not a full makeover.

Small changes can make a big impact:

  • Rearrange furniture to improve flow
  • Restyle shelves with fewer, more intentional pieces
  • Swap out holiday art for calming prints or neutral wall décor
  • Clear visual clutter to let your space breathe

This creates a sense of renewal rather than loss.

Lean Into Winter Cozy

Instead of rushing into spring décor, embrace winter for what it is—quiet, calm, and slow.

Create cozy moments like:

  • A reading nook with a chair, blanket, and lamp
  • A styled coffee table with books, candles, and a tray
  • A bedroom refresh with layered bedding and soft tones

Your home doesn’t need to sparkle to feel special—it just needs to feel intentional.

Make Your Home Feel Lived-In Again

The holidays bring a lot of activity, and once they’re over, the stillness can feel uncomfortable. Filling the void isn’t just about décor—it’s about how you use your space.

  • Play soft background music in the evenings
  • Light a candle during everyday routines
  • Keep one cozy ritual you loved during the holidays, like nightly tea or morning quiet time

These habits bring warmth back into your home in a way decorations alone never could.

A New Kind of Comfort

The end of the holidays doesn’t have to mean the end of cozy. It’s simply a transition—from festive warmth to everyday comfort.

By focusing on lighting, texture, nature, and intentional styling, you can create a home that feels just as inviting—without relying on seasonal décor. Sometimes, the quiet after the holidays is exactly what your home (and heart) needs.

A Personal Reflection: Learning to Love the Quiet After the Holidays

I’ll be honest—taking down the holiday decorations is never easy for me. There’s always a pause once the last box is sealed, when I step back and look at the room and think, That was fast. The house feels quieter, less magical, and almost unfinished, even though everything is technically “back to normal.”

For a long time, I thought that feeling meant I needed to rush into the next season or immediately replace what was taken down. But over the years, I’ve realized the emptiness isn’t really about the decorations—it’s about the shift. The holidays are full, loud, and emotional. When they end, the stillness can feel uncomfortable if we don’t know what to do with it.

Now, instead of trying to fill the space too quickly, I let my home breathe for a few days. I turn on lamps in the evenings, light a candle while I clean or unwind, and slowly restyle instead of rushing to redecorate. I’ve learned that this in-between season is where my home feels the most me—calm, lived-in, and intentional.

The holiday décor may be gone, but the warmth doesn’t have to leave with it. Sometimes, creating a cozy home isn’t about adding more—it’s about choosing what stays and letting your space evolve with you.

Repurposing Your Coffee Table: A Little Creativity Goes a Long Way


Repurposing furniture can feel intimidating—especially when it’s a piece you use every single day. Your coffee table sits at the center of your living room, holding everything from morning mugs to late-night snacks. But what if it could do more?

That’s exactly what one couple discovered when they decided to repurpose theirs—with a little help from the internet.

A Cute Coffee Table Story

Meet Jamie and Alex.

Jamie loved scrolling through home décor ideas, saving photo after photo of beautifully styled living rooms. Alex, on the other hand, was practical—if it worked, why change it? Their coffee table had been with them since their first apartment. It was scratched, a little wobbly, and honestly… boring.

One Saturday morning, Jamie looked at the table and said,
“What if we did something with this instead of buying a new one?”

Alex stared at it, shrugged, and replied,
“Do what exactly?”

And that’s how they found themselves on the couch, coffee in hand, binge-watching online videos titled things like “Coffee Table Makeover in One Weekend” and “You Won’t Believe This DIY Table Transformation.”

By the end of the day, they weren’t experts—but they were inspired.

Step 1: Decide What You Want the Table to Become

The biggest mistake people make when repurposing furniture is starting without a plan. Before touching a paintbrush or screwdriver, ask yourself:

  • Do I need more storage?
  • Do I want this table to make a style statement?
  • Could it serve another function entirely?

Jamie and Alex realized they wanted their coffee table to double as storage and look a little more “grown-up.” That clarity made everything else easier.

Popular coffee table repurposing ideas include:

  • Turning it into a storage trunk
  • Converting it into an upholstered ottoman
  • Using it as a bench or window seat
  • Transforming it into a kids’ activity table

Step 2: Learn From Others (Yes, Videos Count!)

Neither Jamie nor Alex had ever repurposed furniture before—and that’s okay. Online videos gave them:

  • Visual step-by-step guidance
  • Realistic expectations (including mistakes!)
  • Confidence to try something new

When watching tutorials, pay attention to:

  • Tools needed
  • Time commitment
  • Skill level required

Pro tip: Watch at least two or three videos on the same project so you understand different approaches before starting.

Step 3: Prep the Table Properly

This is where many repurposing projects go wrong—skipping prep. Proper preparation makes the final result look polished instead of rushed.

Here’s what that usually includes:

  • Cleaning the table thoroughly
  • Lightly sanding the surface
  • Tightening loose screws or legs
  • Filling in deep scratches or dents

Jamie and Alex learned this the hard way when their first coat of paint looked… questionable. A quick rewind and redo fixed it, and the second attempt was smooth and even.

Step 4: Make Style Choices That Fit Your Home

Repurposing doesn’t mean reinventing your entire décor. The goal is for your coffee table to still belong in your space.

Consider:

  • Paint or stain colors that match your room
  • Hardware that complements nearby furniture
  • Materials that align with your lifestyle (kid-friendly, pet-friendly, etc.)

Jamie chose a warm neutral paint, while Alex picked out simple black hardware. It became a team effort—and honestly, part of the fun.

Step 5: Take Your Time (It’s Not a Race)

Repurposing furniture isn’t about perfection—it’s about creativity and intention. Rushing can lead to frustration, uneven finishes, or skipped steps.

Jamie and Alex spread their project over a weekend. They laughed at small mistakes, celebrated tiny wins, and by Sunday evening, their coffee table felt brand new—without losing its sentimental value.

The Final Result (and Why It Was Worth It)

Their repurposed coffee table now had hidden storage, a fresh look, and a story attached to it. Guests noticed it right away, and Jamie loved saying,
“We did it ourselves.”

Repurposing your coffee table isn’t just a budget-friendly upgrade—it’s a chance to personalize your home and make something old feel meaningful again.

So if you’re staring at your coffee table wondering what it could be, grab a cup of coffee, open a few videos, and start imagining the possibilities. You might surprise yourself.


How to Incorporate the Things You Love Into Your Home Decor (Without Overpowering Your Space)


Your home should feel like you. It should tell your story, reflect your interests, and bring you comfort the moment you walk through the door. But what happens when the things you love—like arcade games, collectibles, or bold hobbies—don’t exactly scream “home decor”?

The good news? You don’t have to sacrifice style to showcase your personality. With a thoughtful approach, you can incorporate what you love into your home without making it feel cluttered, childish, or tacky.

Let’s talk about how to strike that balance.


Start With Subtle Representation

You don’t need a full arcade room to show your love for classic games. Instead of going all-in, choose nods to your interest.

If you love arcade games, consider:

  • Framed vintage arcade artwork or minimalist prints inspired by retro games
  • A single statement piece, like a slim arcade cabinet or tabletop game in a designated space
  • Neutral décor with small pops of color inspired by classic arcade palettes

Subtlety keeps your space intentional rather than overwhelming.


Designate a “Personality Zone”

One of the easiest ways to avoid overpowering your home is to give your interests a home within your home.

This could be:

  • A game corner in the living room
  • A bonus room, basement, or office space
  • A styled shelf or console table with curated items

By containing your arcade-inspired elements to one area, the rest of your home can remain cohesive and calm—while still allowing your personality to shine.


Choose Grown-Up Versions of What You Love

The difference between stylish and tacky often comes down to design quality.

Instead of loud, plastic, or neon-heavy items, look for:

  • Sleek arcade machines with wood finishes or neutral colors
  • Modern bar stools or seating that complement the game area
  • High-quality materials like metal, glass, or natural wood

Think elevated, not novelty.


Blend Your Interest With Your Existing Style

Your hobbies shouldn’t compete with your home’s style—they should complement it.

For example:

  • In a modern home, choose clean lines and monochrome arcade-inspired art
  • In a farmhouse or rustic space, incorporate warm wood tones and vintage-style signage
  • In a minimalist home, limit décor to one or two impactful pieces

When your passion aligns with your overall aesthetic, it feels curated instead of chaotic.


Use Décor as Conversation Pieces

Your interests can become thoughtful design moments rather than visual noise.

Consider:

  • A retro joystick displayed as sculptural décor
  • Coffee table books about gaming history or design
  • Shadow boxes featuring nostalgic elements styled with intention

These pieces add character and invite conversation without dominating the room.


Edit, Don’t Display Everything

Loving something doesn’t mean displaying all of it.

Rotate items seasonally, store extras, and only showcase what truly adds value to your space. Editing keeps your home feeling fresh and prevents visual clutter—one of the biggest contributors to a “tacky” look.


Let Your Home Evolve With You

Your interests may stay the same, but how you express them can evolve. As your style matures, your décor can too. Don’t be afraid to swap bold displays for more refined accents over time.

Your home isn’t a museum—it’s a living, growing space.


Final Thoughts

Incorporating the things you love into your home decor isn’t about making bold statements everywhere—it’s about intentional design choices that reflect who you are.

Whether you love arcade games, music, books, or travel, the key is balance. When done right, your interests enhance your space rather than overpower it—creating a home that feels authentic, stylish, and uniquely yours.

Your home should tell your story… just without shouting it.


Creating a New Look in Your Bathroom: Budget-Friendly Ways to Go From Boring to Stylish


Have you ever walked into your bathroom, looked around, and thought, “This space really needs an update”? You’re not alone. Bathrooms are one of the most used rooms in the home, yet they’re often the last space we think about refreshing. The good news? You don’t need a full renovation or a massive budget to give your bathroom a brand-new look.

With a few intentional updates and an eye on current trends, you can transform a dull bathroom into a stylish, inviting space—without breaking the bank.

Start With Small Changes That Make a Big Impact

Before tearing anything out, take a moment to assess what’s really making your bathroom feel outdated. Is it the color scheme? The fixtures? The lack of personality? Often, small changes can completely shift the feel of the space.

Swapping out hardware, updating accessories, or adding texture through textiles can instantly modernize your bathroom. Think of these changes as “mini upgrades” that work together to create a cohesive look.

Budget-Friendly Bathroom Trends Worth Trying

If you’re looking for inspiration, these bathroom trends are stylish, affordable, and easy to incorporate—no remodel required.

1. Warm Neutrals and Earthy Tones

All-white bathrooms are being replaced with warmer, more inviting color palettes. Soft beiges, warm grays, muted greens, and clay-inspired tones add depth while still keeping the space calm and spa-like. A fresh coat of paint or new towels in these shades can completely change the mood of your bathroom.

Recommended products:

  • Neutral or sage green towel sets
  • Textured bath mats in warm tones
  • Minimalist wall art with earthy color palettes

2. Statement Shower Curtains

A shower curtain is one of the easiest and most affordable ways to introduce personality. Patterns, textured fabrics, subtle stripes, or botanical prints are trending and can act as a focal point in an otherwise simple bathroom. Choose one that complements your color scheme to tie the room together.

Recommended products:

  • Linen-look or waffle-textured shower curtains
  • Botanical or abstract patterned curtains
  • Neutral fabric shower curtains with subtle detailing

3. Upgraded Fixtures (Without the High Cost)

Matte black, brushed gold, and soft brass finishes are still popular—and you don’t need to replace everything at once. Updating your faucet, towel bars, or toilet paper holder can make the space feel more intentional and modern. Even changing one or two fixtures can make a noticeable difference.

Recommended products:

  • Matte black bathroom faucet
  • Brushed gold towel bars or toilet paper holders
  • Coordinated hardware sets for a cohesive look

4. Open and Decorative Storage

Bathrooms are leaning toward functional yet stylish storage. Floating shelves, woven baskets, and decorative trays allow you to store everyday items while adding warmth and texture. This trend is perfect for smaller bathrooms where storage needs to work double duty.

Recommended products:

  • Floating wood shelves
  • Woven storage baskets
  • Decorative vanity trays for daily essentials

5. Layered Textures for a Cozy Feel

Texture is key to making a bathroom feel less sterile. Plush bath mats, waffle or linen-style towels, wood accents, and ceramic accessories add visual interest and comfort. Mixing textures helps your bathroom feel curated rather than basic.

Recommended products:

  • Waffle-knit or Turkish-style towels
  • Plush bath rugs
  • Ceramic or stone bathroom accessories

Don’t Underestimate the Power of Accessories

Accessories are often overlooked, but they play a huge role in pulling the look together. Matching soap dispensers, toothbrush holders, and trays create a polished appearance. Adding a small plant or faux greenery brings life into the space and works well with almost any style.

Mirrors are another budget-friendly upgrade. A framed mirror or a uniquely shaped one can elevate your vanity area without changing the vanity itself.

Creating a Stylish Bathroom on Your Terms

Refreshing your bathroom doesn’t have to mean chasing every trend or spending a lot of money. The key is choosing updates that reflect your personal style while improving how the space feels and functions. Whether you prefer modern, cozy, minimalist, or a mix of styles, intentional changes can turn your bathroom into a space you actually enjoy being in.

If your bathroom has been feeling boring or outdated, consider this your sign to refresh it. A few thoughtful updates can go a long way—and your future self will thank you every time you walk in.